How to create a search engine for your WordPress site

Zoom Search Engine is a software package that allows you to create a powerful custom search engine for your website. It is unlike other search solutions in that it gives you full control over its indexing capabilities, and there is no advertising or annual fees, while being one of the easiest to use and most feature packed solutions on the market. More on the advantages of using Zoom here.

Another key benefit in using Zoom on your WordPress site is that it can be hosted and indexed within an intranet. Other search services like Google Syndicated Search are remotely hosted, and require your website to be publicly accessible over the Internet. Searches will also need to occur with full Internet access, and you will have no control as to how often the index is updated or what pages should be included or excluded from the indexing. With Zoom, you can run and schedule the indexing yourself on any Windows computer on the network.

The following article explains how to use Zoom with your WordPress website. We provide this tutorial to explain some common details and steps to get a working Zoom Search Engine up and running, and integrated with your WordPress web site as quickly as possible.

What you will need

Zoom is free for small websites of up to 50 pages. For larger sites, commercial editions are available, with the Professional Edition being the most popular, which indexes up to 50,000 pages. Detailed comparison of the different editions available can be found here.

Using Zoom and indexing your website

Using Zoom on a WordPress website is much the same as using it on any other website, so you will find much more detailed information on installing and running Zoom in the Users Guide (free PDF download). We recommend referring to the Users Guide for most instructions and taking note of the following tips for guidance/reference for WordPress specific details.

But to summarize, Zoom has two main parts. The Indexer software which runs on your desktop computer, scans your website and generates a set of "index files". These files are then uploaded to your website and provide the searching functionality. You will also be using the Indexer to update your search engine when you make changes to your website in the future.

  1. For a WordPress website, you should use "Spider Mode" in Zoom, which allows it to crawl your live WordPress website. You should specify the URL to your website (eg. "http://www.mysite.com/") as your Start Spider URL.

  2. The next thing to note is when you are selecting your "Platform" or scripting option. This is the type of scripting you would like Zoom to use internally to provide the search function on your website. You can generally select anything that your web server supports (Zoom offers PHP, ASP, Javascript and CGI options). But a web server running a WordPress website must have PHP support enabled, so the most common choice here would be "PHP".

  3. One important thing to be aware of when indexing a WordPress site, is that dynamically generated sites, especially complex CMS systems like WordPress (and other forum software, photo galleries, etc.) are generally not particularly Search Engine Friendly. Some of these issues are discussed here, which cover general issues with indexing message boards, etc.

    The key here is that you may need to specify a Skip List of pages which you do not want the spider to follow whilst crawling your website. These include, for example, login or register links, to forum features such as posting and moderating. Due to the various ways a WordPress site can be configured (and all the different combination of plugins that you can install or write), we can not provide a complete list of pages to skip - it will vary from site to site. We recommend taking a careful look at the pages being indexed, and determining what you need to skip based on the URLs. Having said that, the following is a brief list of common skip page entries which should be used when indexing WordPress sites:/login/
    /logout/
    /calendar/
    /tag/
    /rss/
    &tagid=
    &mode=asearch
    &mode=single
    help.php
    cal_m=
    cal_y=
    search.php
    post.php
    edit.php
    &advanced=
    &mode=

Once properly configured, Zoom will be able to scan through all the pages of your site and create a set of index files for your search engine.

Spider indexing - scans an online hosted website by spider crawling the links it finds


Zoom can FTP upload files to your web server. It will remember your settings and can be configured to automatically upload after every indexing.

Down left arrow

These files will then need to be uploaded to your web server. Zoom has built-in FTP functionality so it can do this for you.

We recommend you use Zoom's FTP functionality because some FTP clients may incorrectly upload the files in Text mode. All files should be uploaded in Binary mode.

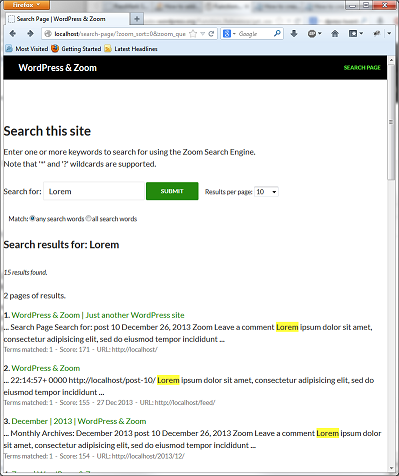
Once the files are correctly uploaded, you will be able to access your new search engine by entering in the URL to the search page in your web browser. For example, if you uploaded your files to a sub-folder named "zoom", your new search page will be at http://www.mysite.com/zoom/search.php

Enter in some search words and give it a try!

Using Zoom as a DNN Search replacement

As you will notice, the default search page is fairly blank, as it has not yet been customized to suit the look and feel of your website. In addition to this, we would want to integrate the search page within your WordPress site, and we will explain this below.

Integrating your Zoom search page into WordPress

Easy:
At this point, you should have a working search page which you can access and perform search queries on as seen above. The simplest option is to add an item in your menu which links to your new search page. You can use your search page just as it is, and simply modify the "search_template.html" file to match the look of your site. For example, from the "WordPress" administration page, select "Apperance->Menus". Edit your existing menu (or create a new one) and click on "Links". You can specify a name for the link (eg. "Search") and the location for the "URL" box. Here you should specify the URL to the working search page that you setup earlier (eg. "http://www.mysite.com/zoom/search.php").

Adding a new resource for your Search page in WordPress

However, if you want to further integrate the search page inside your WordPress website (so that it will maintain the same skinning and various modules you are using), then read on.

Harder:

Another option is to create a custom "Page Template" in WordPress that will include the search.php file from Zoom. (Note: Visit WordPress' site for more information and proper syntax & structure for creating Custom Page Templates.) Before we get started, there are some additional steps that needs to be done beforehand. We will need to make changes in WordPress and then in Zoom.

The exact steps may vary depending on theme that is currently in use, but the general process is outlined below.
  1. The "Default" Permalink URL style (http://www.mysite.com/?p=123) in WordPress is not very search engine friendly, and as WordPress describes it themselves as "Ugly". While you may be able to get it working with Zoom using the default style (not discussed here, as a lot of additional work is involved), we recommend using one of the other Permalink options. From the WordPress Administration page, go to "Settings->Permalinks". We will choose to use the "Post name" style, i.e. http://www.mysite.com/sample-post/.

  2. A easy way for making a new Page template is to use with a copy of your page.php in the current active theme directory in WordPress. This way you start off with the HTML structure of your other pages, then you can edit as needed to include Zoom search. We will create a copy of page.php and call it mysearch.php. Edit the file and include the template name at the very top of the page.
    <?php
    /*
    Template Name: mysearch
    */
    ?>
    Further down the page, look for the content <div> tag. The contents in between this tag can be removed and replaced with the code to call Zoom search page. <?php
    virtual("http://www.mysite.com/zoom/search.php");
    ?>
    Save the file.

  3. From WordPress Administration page, you will add a new page to your site. "Pages->Add New". Give the page a title, i.e. Search Page. Under "Page Attributes", select the Template dropdown box and locate the name of the new template file created in the previous step. Copy or take note of the permalink URL for this page. Click Publish to make the page live.

  4. You can go to your new search page and view the default search form, however the search implementation will not work just yet. We need to change a couple of settings in our Zoom configuration and reindex to apply those settings. In Zoom, under "Configure->Advance", enter the permalink URL for the search page into the "Link back URL:" box. Additionally, enable the checkbox for "Disable charset enforcing on search script". Reindex and upload the files to your site.
    Adding a new resource for your Search page in WordPress

Your search should now be working. You will be able to customize the colours, fonts and overall look of the search page and search results by modifying the "search_template.html" page. Please see chapter 6 of the Users Guide ("How do I customize the look of my search page?") for more information.

Search page on WordPress site

Adding search boxes to your other web pages

You may now be wondering how you can add search boxes on the other pages of your website. These boxes are often a simpler, smaller version of the search box you see on the search page that allows people to submit a simple search query from any where on the site. It will then take them to this search page with their results.

To do this, you will need to modify your theme header to include additional HTML code.

<form method="get" action="http://www.mysite.com/zoom/search.php">
<input type="text" name="zoom_query" size="20" />
<input type="submit" value="Search" />
</form>

You will need to replace the URL in the above HTML (in bold) with the actual URL to the new search page that you created earlier. Note again that you may want to modify your "search_template.html" file to make your search page match the look and feel of the rest of your WordPress site.

Now you have your very own custom search engine as part of your WordPress web site! I hope the above has been helpful in getting you up and running. There are many options and configurations possible with Zoom which you can fine-tune to your heart's content, including highlighting, categories, and more. Please download a copy of the Users Guide for more information.

Enjoy your new search engine!

Troubleshooting

If you have any problems with indexing your website, you should refer to our extensive online support section for help. There is also a Discussion Forum for seeking and sharing tips and advice.


Return to the Zoom Search Engine website